It has been more than a year since I last managed to write a post for the blog.
Before I started renovating the house, I remember watching reports of building projects, thinking ‘how can people miscalculate the budget by 30%’ or ‘why is it taking them 3 years longer than planned’.
I’m starting to realize that the misconception of what is possible, and how fast anything can be done, lies way beyond the commonly mistaken belief in the principle ‘that could never happen to me’.
A big part of why creating a legal object in the physical reality of our world takes such a long time, is because we have made some very complex systems of theories (bureaucracy); constituting a base in which the consumer industry is maneuvering their clients (building companies); while they try to create a dream object for their end client. In short: putting a house together requires the cooperation of a lot of different people who have completely different interests. And I’m not just pointing that out to identify excuses for the length of my project. 😉
So what was going on with the renovation in the past year?
After the house has been refurbished from the outside, time came to start focusing on the interior.

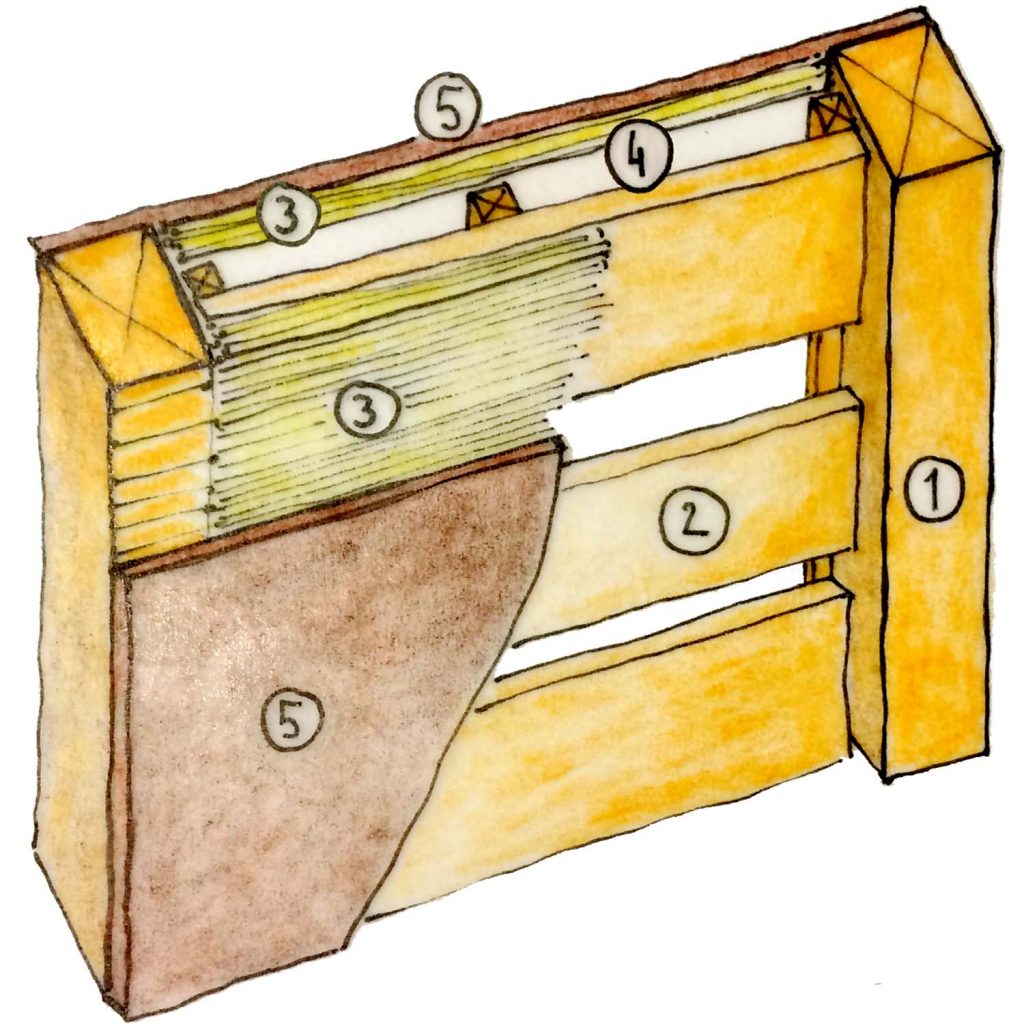
The first thing I wanted to put up was the partition wall. After lengthy discussions on the type of materials to be used and how to put them together I decided to use the following wall composition:
- vertical wooden studs dim. 10/6 cm fixed to the floor and roof
- horizontal wooden boards 2.5 cm thick attached to the vertical studs
- reed panels 2 cm thick attached to the wooden boards directly on the front side and on 2 cm thick wooden spacers on the back side
- 2 cm air gap between the wooden boards and the reed panels on the rear side of the wall constituting an opening for the plumbing and electrical cables
- clay plasters in 2 layers, 2 cm thick in total: base coat 1.5 cm and finish coat 0.5 cm.
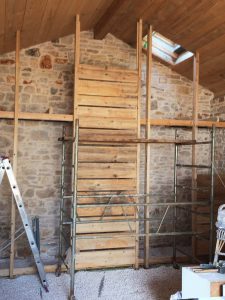
Again it took me quite some time to find an appropriate person to put up the wooden construction. Once we got started though, the groundwork was put up in 2 days.
After the base wooden structure was set up, I could take my time and continue to put up the rest of the elements by myself, experimenting as I went.
First the wooden boards came up.
Then there were the reed panels.
And then the clay plaster experiments could start.
First I needed the right material. Instead of buying the already made clay plaster mixtures, I decided to start from scratch.
So what exactly is plaster? And what is clay plaster made of? Let’s talk terminology 🙂
Plaster is the finishing layer of a wall or a ceiling used as decoration and/or protection.
The base of each plaster constitutes 2 ingredients: aggregate and binder.
Aggregate is stone decomposed to various dimensions, ranging from gravel (>2.0 mm), sand (0.06 mm – 2 mm) to silt (0.002 – 0.06 mm).
Binder is the gluing agent combining the aggregate into a usable mixture. Commonly used binders are clay, lime, gypsum and cement.
Clay is the ultimate decomposed product of rocks, primarily comprised of minerals. The particles have a diameter smaller than 0.002 mm.
Water is mixed into the combination of aggregate and binder to make it more plastic, which means creating a workable mixture that is easier to apply to the supporting structure.
Other components might be added to improve certain characteristics, but they are optional (fibers, oils, pigments,…).
When I started discovering the incredibly vast world of natural materials in Istria, the local earth stood out as the most fascinating element to me. I tried to find a way in which I could use the beautiful reddish soil as it is and add as little as needed in order to use it as a building material.
Since soil is naturally a mixture of stones of various dimensions combined with clay, what else would I need to add to be able to use soil as plaster?
I hauled 9 m3 of local soil from a nearby building site and started experimenting.
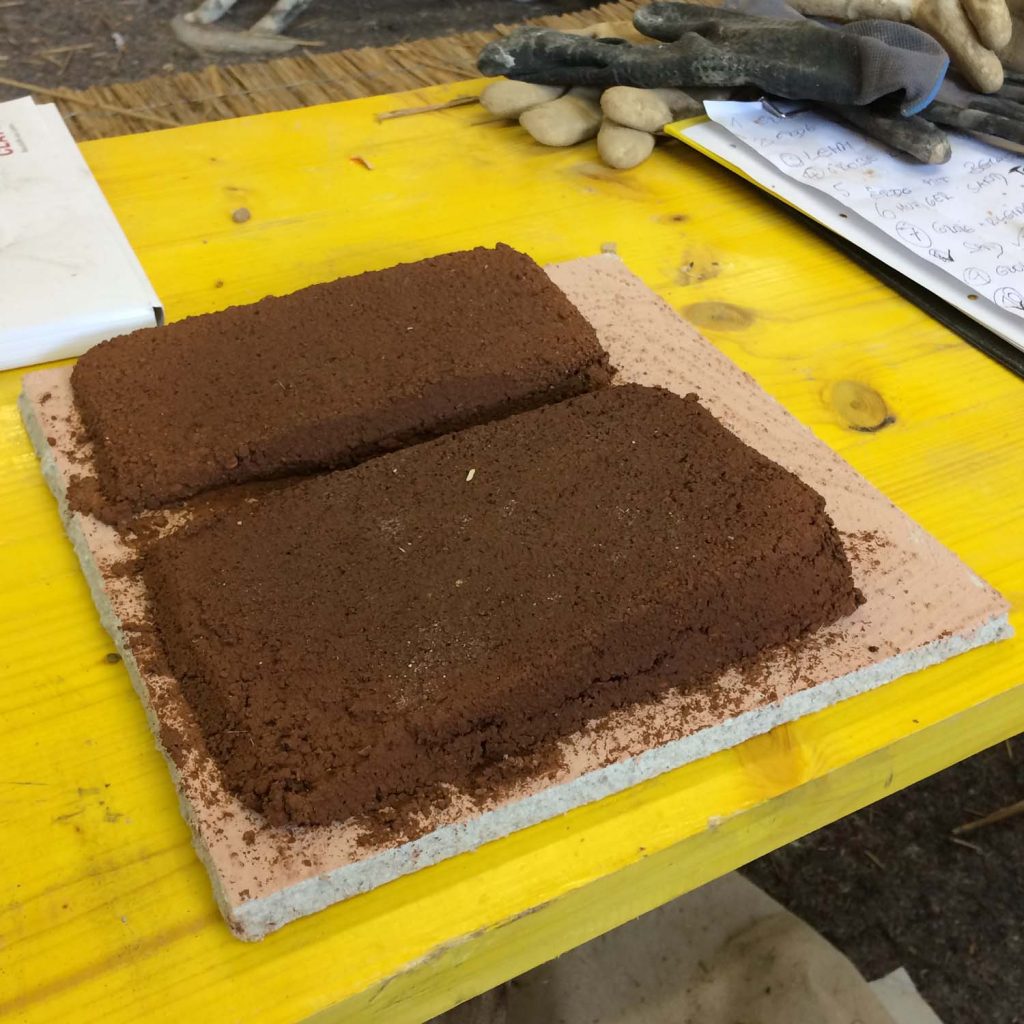
First the classic tests: mixing the material with water, making a ball, rolling a cigar,… The real breakthrough came when I went to an amazing workshop in Austria where (among other things) we made a sample out of the Istrian soil I brought with me.
The material dried and it seemed to behave like a proper plaster. The only thing we added to the original soil was sand. Could it be that easy?
I decided to give the simplest option a try: adding only aggregate (sand). The first thing I needed to test out was how much sand to add.
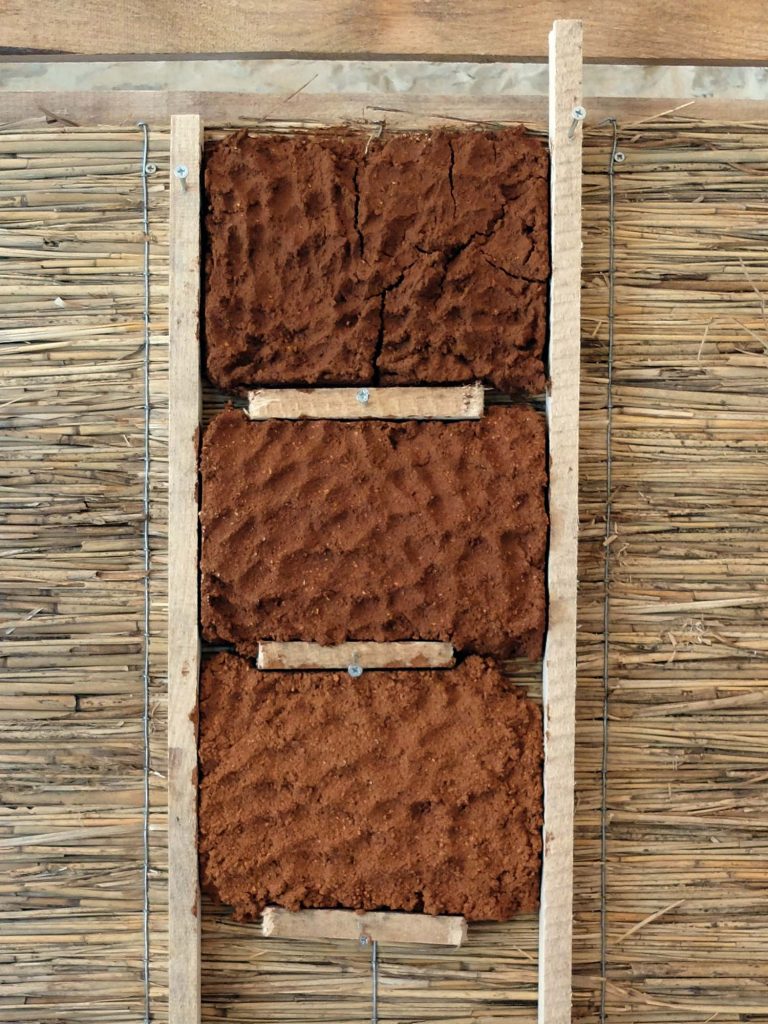
I made different mixtures of earth and sand (grain size from 0 to 4 mm) and applied them to my reed panels, in order to figure out which one has the best combination of properties: holds well on the reed, has no cracks and does not fall apart easily when you press on it.
- 1 volume of earth combined with 1 volume of sand (top frame)
- 1 volume of earth combined with 2 volumes of sand (middle frame)
- 1 volume of earth combined with 3 volumes of sand (bottom frame).
The best combination of characteristics were demonstrated in the bottom frame: the material stuck well to the reed (enough clay to bond the aggregate together and stick it to the support construction), almost no cracks (not too much clay), fell apart only when I hit the plaster with a lot of force (not too much sand).
What is the right thickness of a clay plaster? It depends on the sizes of the grains in the mixture. Optimal is 3x size of biggest particle. In my case the biggest sand particles had 4 mm which made the optimal plaster 1.2 cm thick.
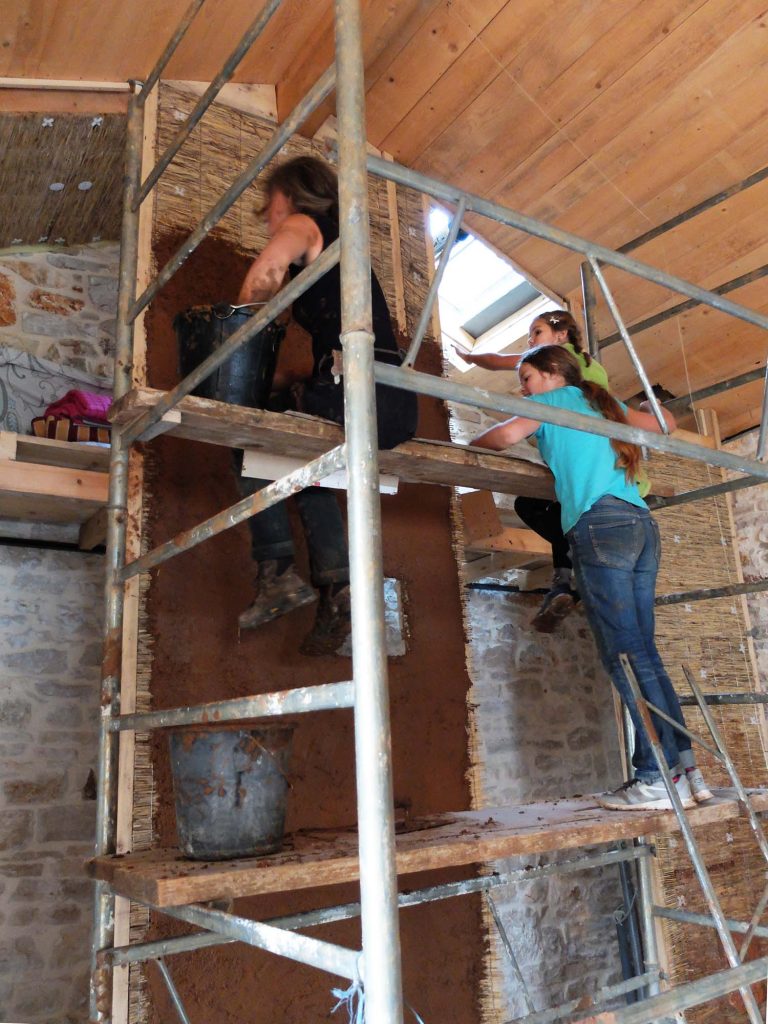
I mixed (quite) some buckets of the concoction, got helpers and we started applying the mixture on the wall. Finally!
The function of the base coat is to smooth out any irregularities in the wall, in order to obtain an even surface with good binding attributes on which the finish coat can be applied evenly. There were a lot of details that needed to be refined before the finish coat could be applied.
The door frames were installed so I put some flax net around the corners to prevent the cracks from appearing while the material dries.
I put the little windows in place, installed the electrical outlets and filled in all the holes I could find. The base coat was ready.
Because I wanted a smooth finish for the plaster, I sieved both of the materials through a mesh with openings the size of 1 mm.
I did a new set of tests to try out the finishing layer on the dried base coat.
I chose the composition (1 volume of earth mixed with 3.5 volumes of sand grains 0 – 1 mm), made enough mixture to cover the whole wall in one go with 3 mm cover and got to work.
It took me 21 hours and it looked amazing.
Then it all cracked.
*Mistake No.1: no fibers in the base coat (a conscious choice).
So I sanded all of the cracks.
I filled up the cracks with material in order to make the plaster more stable, and had another try with a layer of material between 1 and 2 mm thick. I took me 16 hours this time and again it looked amazing.
And again it all cracked.
*Mistake No.2: if the supporting structure is as unstable as reed panels and you don’t use fibers to stabilize the base coat of the plaster, you can secure the plaster surface with a mesh (jute, flax) spread out across the entire surface of the base coat (again a conscious choice not to do that).
I was getting tired of the game of putting up a new beautiful layer of material and have it crack when it dries. So this time I tried another experiment: I sanded the cracks and filled them up with the material, but instead of putting on another layer of material, I dissolved the clay in water and applied it as paint.
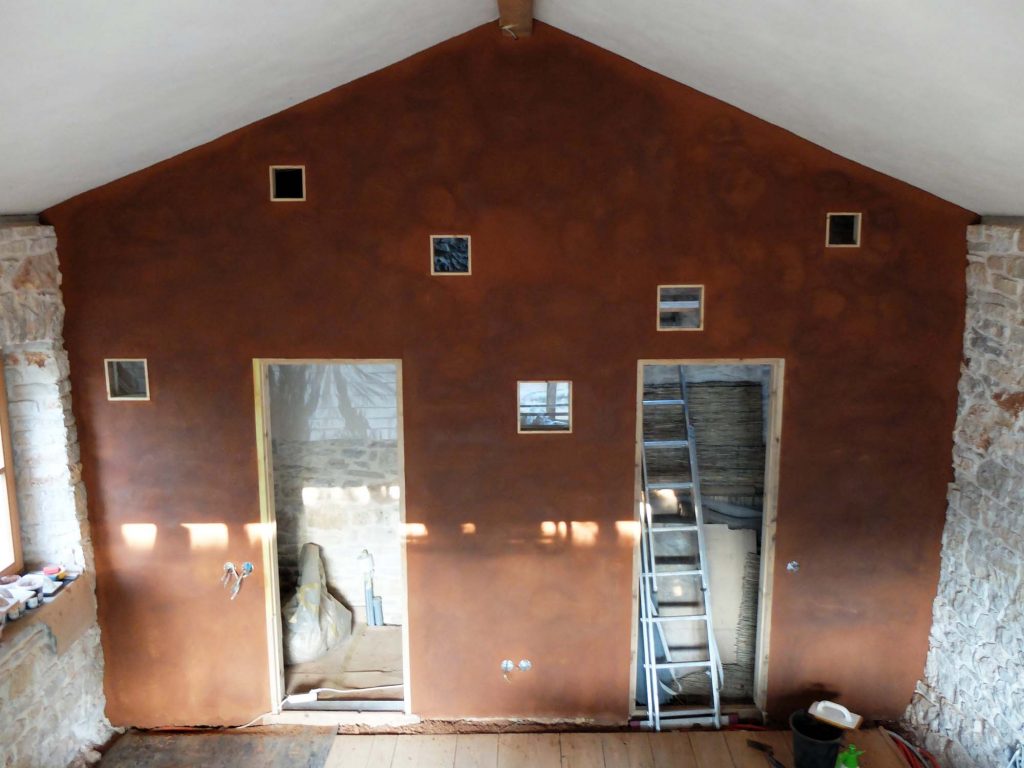
It took me 4.5 hours and it looked good. And this time it didn’t crack. 🙂
So what were the lessons of my experimental procedure with the use of Istrian earth?
The most important one: yes, you can utilize the soil just as it is and use it in various ways as a building material. But through the different mistakes I made I also realized another important aspect: by using proper additions with the mixture, you can make your life a whole lot easier. 🙂
