Restoring the stone walls, Part III

We finally made it through this year’s prolonged winter, congratulations everyone! I don’t know about you, but I feel like a new person now and I am ready to take up new adventures.

So what is left of the last year’s restoration tale, before we continue with this year’s mission to finish the renovation?

As I’m sure you have already noticed, there are many mysteries the stone can reveal to us. It can perform in astonishing compositions when it’s handled with great care by professionals.

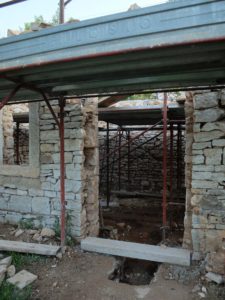
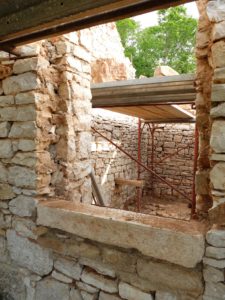
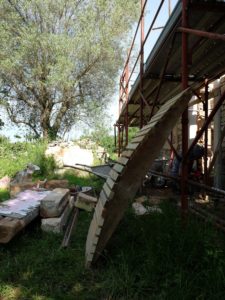
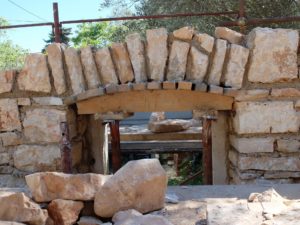
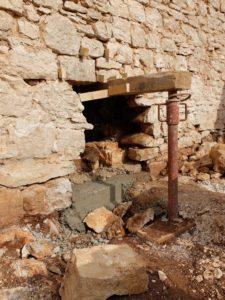
We’ve built foundations, replaced the unstable parts of the walls, changed the openings and constructed arches. Then all we needed to do is raise the walls a little bit, fill in the joints from the outside and inside to plug the holes in the walls and fill it up with liquid mortar.

Let’s do it the old school way 🙂


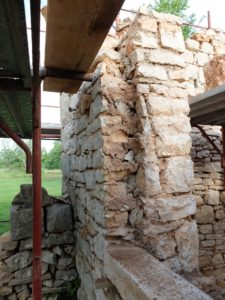
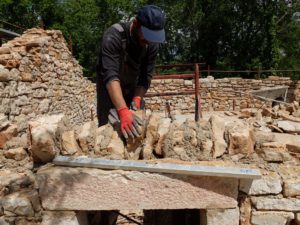
You grab a string, position it on steel bars at appropriate heights to shape the desired form of the house and secure it with a stone.


Repeat on all 4 sides of the house and fill in the missing parts of the façade with stonework up to the chosen vertex.

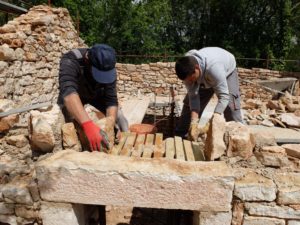
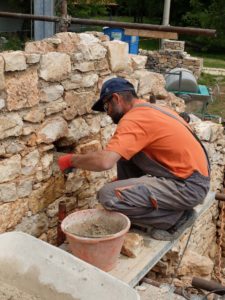
Next step is to make sure there are no cavities in the walls. Yes, that’s right: scratch out any old mortar that remained in the walls, then fill up all the joints with new mortar.


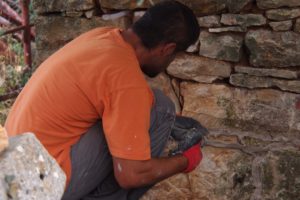
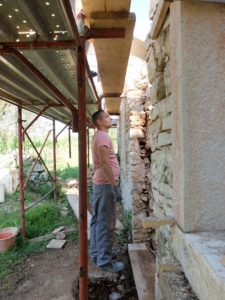
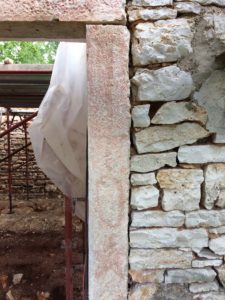
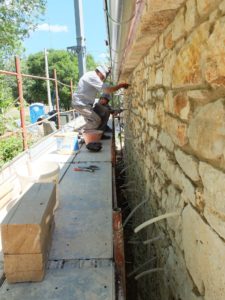
If this were a normal house with a normal client the story would end here. Because this is not the case, the client (yes, that’s me:) wanted the stones to stand out a few centimetres out of the mortar. What does that mean? Well, scratching some new mortar out again until the client is happy with the depth of the joints 🙂

The reason behind me being tenacious in this case was this: the sealant between the stones of the house used to be made out of orange coloured mortar (Istrian earth) which accentuated each individual stone in the wall.

The replacing mortar’s colour was very similar to the colour of the stones which could mean the whole wall could visually melt into a soup. I liked the accentuated stone structure and the way in which I thought we could accomplish the same effect was by pushing the joints a few centimetres into the wall so the stonework would be underlined by the shade around each stone.


I am happy I made that decision. Besides achieving the desired effect on the walls a by-product were some of the finest moments of last year’s summer. Mladen, Kristijan and I, sitting on the scaffolding, scratching out the joints surrounded only with peaceful nature and discussing random thoughts while deeply immersed in work. Ah, the bliss of working with professionals.

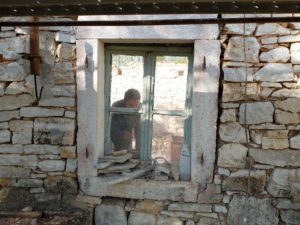
Filling up the walls with mortar (no cement!) was the last step to making the structure as stable and solid as possible without building in any steel wires or apply concrete across the whole surfaces.

During the process of the joint making there were about 200 hoses inserted all across the surface of the walls.


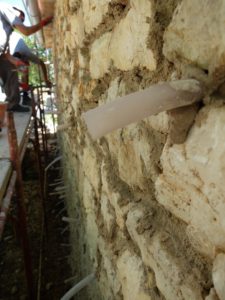
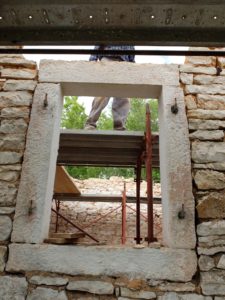
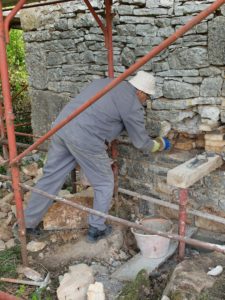
When the joints dry out enough so they are stable (not a problem in the mid summer heat in Croatia), you prepare the mortar for the filling, which needs to be a bit more liquid then the mixture you use for the joints.

Fill up the machine and fill in one hose after another. Start with a hose at the bottom of the wall and pour in just enough material so it starts leaking out of the hose next to it.


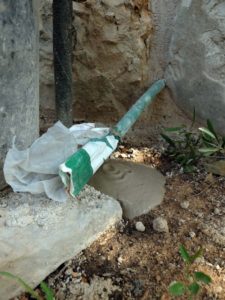
Wait until the first fill solidifies enough and continue with the next hose. All 200 of them, one after the other.

It sounds painstakingly slow, right? That’s exactly what the process felt like.


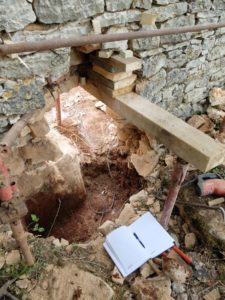
There was a surprise waiting for us in the wall. A small ornamented gem of antiquity, quietly sitting in the wall all those years just waiting to be discovered. I still don’t know how the team managed to find it because it was built into the wall with its decorative side hidden.


Spolia is a conservationist term used for building stones or decorative sculptures reused in a new construction. The practice was common in late antiquity. Entire obsolete structures are known to have been demolished to enable the construction of the new ones. The practice is of particular interest to (architectural) historians and archaeologists since the gravestones, monuments and architectural fragments of ancientness are frequently found embedded in structures built centuries or millennia later.

I’ll leave it to you to find the exact position of our adorning jewel of former age in the wall. Good luck with the search! 🙂

Restoring the stone walls, Part II

I do have to confess, I am a junkie. I’m addicted to excellence, quality and beauty, that arise from a complex situation in which people apply their knowledge and passion to solve a riddle. Add a pinch of synergy and the potion becomes magical!

Last time I shared with you the story about a segment of a load bearing wall that was removed and rebuilt, this time, there is more magic wall tricks in store for you.

Want to make the doors and windows higher? If you’re an architect, I’m quite sure you’re familiar with the command ‘stretch’: you select the end points of the lines on a drawing and extend them to the desired length. So that’s exactly what I have done on the south façade to make the windows and doors suitable for people higher than me 🙂

How does ‘stretch’ translate into real life on a stone wall? Piece of cake. You just remove the stone frames around the openings, raise the aperture, rebuild the structure above the hole in the wall and voilà, you have extended your view onto the world.


Step 1: remove the stone frames of the doors


Step 2: get the new, higher stones for the sides of the frame


Step 3: transport the heavy stones with the crane


Step 4: build the frames in


What about the windows?


Step 1: remove the existing frame of the window


Step 2: use the stone acquired from the door frames and cut them to the desired height (we recycle as much as we can)


Step 3: transport the stone frames manually


Step 4: build a wooden construction for the arch


Step 5: build in the stone frames and insert the temporary wooden construction


Step 6: support and align the wooden construction


Step 7: build an arch above the window


Step 8: repeat for the other window.


We did find one intriguing detail under all the layers of paint we removed from the stone frames and I can’t resist the temptation to share it with you.

It is an art work containing a star and the name of a personage who sculpted the Balkan region more than any other force in the 20th century. Can you recognise the name?

Restoring the stone walls, Part I

I have been waiting for such a long time to be able to bring this bewitching old pearl back to lustre. Finally, the time came to focus on the most intriguing part of the project: renovation of the beautiful stone walls.

I was filled with high hopes and expectations we can rescue the walls in their entirety, reverse the wary time and usage inflicted upon them. Before we began a dark thought fluttered by: were my expectancies too high and not all of the walls can be brought back to life as I imagined it? As I was about to find out, true skills crack the hardest restoration nuts.

Old structures are an asylum for stories and myths. So many tales lie written in the dust of those walls. As people pass on, only substance remains to pass on the story it beholds. If only walls could talk. And in our case, they do.

Today I have an interesting story the whispering stones wanted me to share with you.

It is a fable about a person being hidden in the house while the WWII army was sweeping the premises. Was he really stashed underneath the floor behind the bed? We didn’t find any holes in the floor, but there was a big round swelling behind the bed on the bottom of the west wall. Big enough to hide a human being back in the time of need? I’m not sure about that, but definitely big enough to need reconstruction.


How do you replace a part of a load bearing wall weighted with all the load of the stones piled upon it?

Step 1: get the best possible restoration team experienced in making rocks fly 🙂

Step 2: create a self supporting arch in stone hammering conical wood parts in the joints amongst the stones


Step 3: support the weight with a wooden beam resting on 2 jack posts (one on each side of the wall)


Step 4: hammer in some more wood to brace the arch


Step 5: remove the stones underneath the arch (meaning: fabricate a gigantic hole in the load bearing wall!)


Step 6: make sure to extract the human being hiding in the hole before filling it up with cement and stones; after all, this isn’t Italy (any more)


Step 7: dig up the earth and make foundations underneath the wall where needed


Step 8: fill in the hole building a typical stone supporting wall with mortar filling the joints and wait a week or so for the mortar to dry


Step 9: remove the supporting construction and admire in awe.